March 29, 2012

Fun Friday YNS - Making Chipboard Buttons


It's another fabulous Fun Friday with Your Next Stamp.
(click images below to enlarge and get a closer look)

For today's card I used the new Dress Up Fhiona Stamp and Die set. This set is amazing and so fun to use. I love doing cards that have bee's, so I was thrilled when I realized this set allows you to create a bee. 


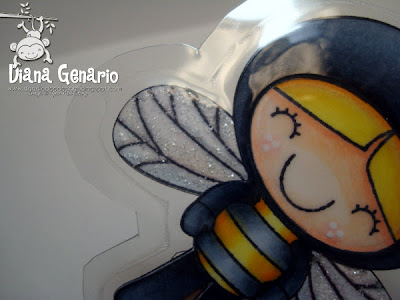
I used my Cricut Expressions and Critters Cartridge to create the Bee Hive. How cute is that - eppp!!! I also used Stickles for the wings and rhinestones for the antenna. I incorporated cork board for my background. I love using this medium on card making. It has such an awesome natural look.


My sentiment is computer generated. I used Boston Traffic font, which I downloaded for free online. Just Google 'Free Fonts' and there are several sites that offer free font options you can add to Word. The options are endless.

I added my sentiment on a piece of Vellum (remember that stuff lol). I always struggled with how to use Vellum best, and I love it for sentiment flags. This way you can still see threw it and not disturb the integrity of the desogn on your card. 

I did not have a black button for my project, so I created this one with chipboard. 

SCROLL DOWN to see my Tutorial on how this is done.


Making a Button from Chipboard Tutorial
(you can click on any picture to enlarge it)

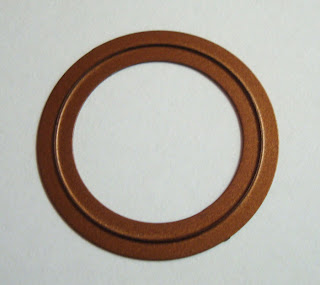
Step 1 Take any existing piece of chipboard regardless of the size. Choose any size and shape nestibility that you want your button to be and place it cutting side down. I had a larger round piece of chipboard, (which was too big for a button), and I chose the smallest size nestibility circle. Tape down your die which helps to hold the die in place, so when you run it through your Die Cutting machine, it will not slip and move on you.

STEP 1


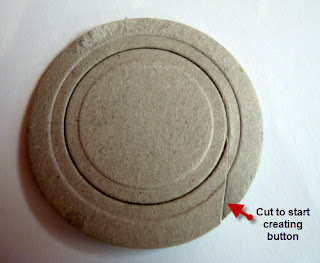
 STEP 2:  Most Die Cutting machines will not cut all the way through, I just needed the indent from the die.  If you can get it to cut all the way through, skip this step. My Chipboard was extremely thick. I used my heavy duty scissors and I cut all the way around.
 
 STEP 2

At this point you can take a fine grit sandpaper and sand around the cut edges to smooth things off. I did not so this, but next time I will.


STEP 3:  Use whatever sharp object you have to create two holes. You may also do a four hole button pattern as well.  

STEP 3


STEP 4: Using a 100 Black Copics Marker you can proceed to color the button. You may do this with the marker itself, or if you have the Copics airbrush system use that. Use double sided tape to to hold the button down so it does not move while coloring.

STEP 4

 
This is the air compressor that I use for my Copics airbrush system. Kelly purchased this for me at Hobby Lobby and used a 40% off coupon. I love it, and works perfect for the small amounts of airbrushing needed for making cards, and YES it's orange like the rest of my craft room lol.


STEP 4: Using tweezers, hold the wet painted button and use your 100 Black Copic Marker to color the free edge.

 STEP 4


STEP 5:  Allow the button to dry and decorate as you like. 
 
STEP 5


Finally Results! 


March 11, 2012

March Your Next Stamp Blog Hop - New Release!


Blog Hop Starts: Sunday, March 11 at 8:00AM (EST)
Blog Hop ends: Tuesday, March 13th at Midnight (EST)

If you came here from Amy's Blog you are right on track. If not you can start the Hop at Maureen's Blog.

We have 2 great prizes for all that participate in the Hop.
Tags Galore One Stamp and Die Combo AND a Secret Blogger prize! In order to qualify for the prizes you have to comment on EVERY blog throughout the Hop. There is a linky set up at the YNS Blog for you to enter after you leave comments on each blog.

Now I know I say this every release, but one of today's releases is the most fabulous Stamp and Die set of all time. Dress up Fhiona Stamp and Die set!!!! This set is so addictive for all the combinations you can make. A Butterfly, Dragonfly, Bumblebee, Bunny, Cat, Dog etc....


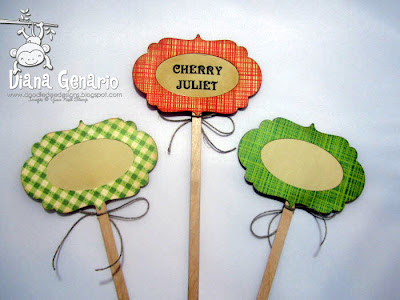
Since I have been setting up my seedlings for planting for the Spring I have been making a bunch of Plant Markers. I created these lil cuties to put in my planters outside to dress them up.


I even laminated them so they can be outside and not be damaged by the weather!


Once I started creating these cuties, I just couldn't stop. They really are so addicting. I am in love with this set!


I even added Stickles to each to make them really sparkly when the sun hits them! 


These would look adorable in indoor or outdoor planters :)

Don't forget to leave a comment to qualify for the prizes. Karen also has put together some awesome bundles for sale at the YNS Store, and we have an awesome Bargain Bin not to be missed.

Your next stop on this Hop is Crystal our guest designer and old YNS DT member! So great to have her back as a guest.

Thanks for visiting and Happy Hopping.

March 9, 2012

Fun Friday YNS - Making Planter Stakes


Today I have a super fun project for those gardeners like myself out there! And a great tip on how to use your Fancy Frame Die set to create them.

This is the time of year when I start planting up my vegetables for Spring. I start my seeds indoors, grow them for 2 months and then plant them outdoors come May when they are strong enough. 

Using the Your Next Stamp Fancy Frame Die Set - I created these... 


 This way I can easily identify my seedlings and make sure I am giving each the proper care before I plant them outside. 

On the back of the Planter Markers, I either have added the variety that I planted, or left the tag blank so I can write in when I planted them and the variety name.


It makes planting seeds to create seedlings indoor a breeze.


If you are wanting to use these tags outside, you can simply laminate them to weather proof them. I will do so to mine once I move my plants outdoors and place them in there permanent planters.


These where so much fun to make. There are so many options once you get started. The hardest thing will be deciding how many you want to make lol.


I will be making at least 10 more of these for the remainder of my pots that I have started indoors.


Now in case you are not a gardener, have no fear. You can use these labels anywhere in your home. You can label jars, containers, shoe boxes, storage boxes and on and on. The possibilities are endless. 
Use that Fancy Frame for labeling just about anything!

Thanks for visiting today! :)

ShareThis